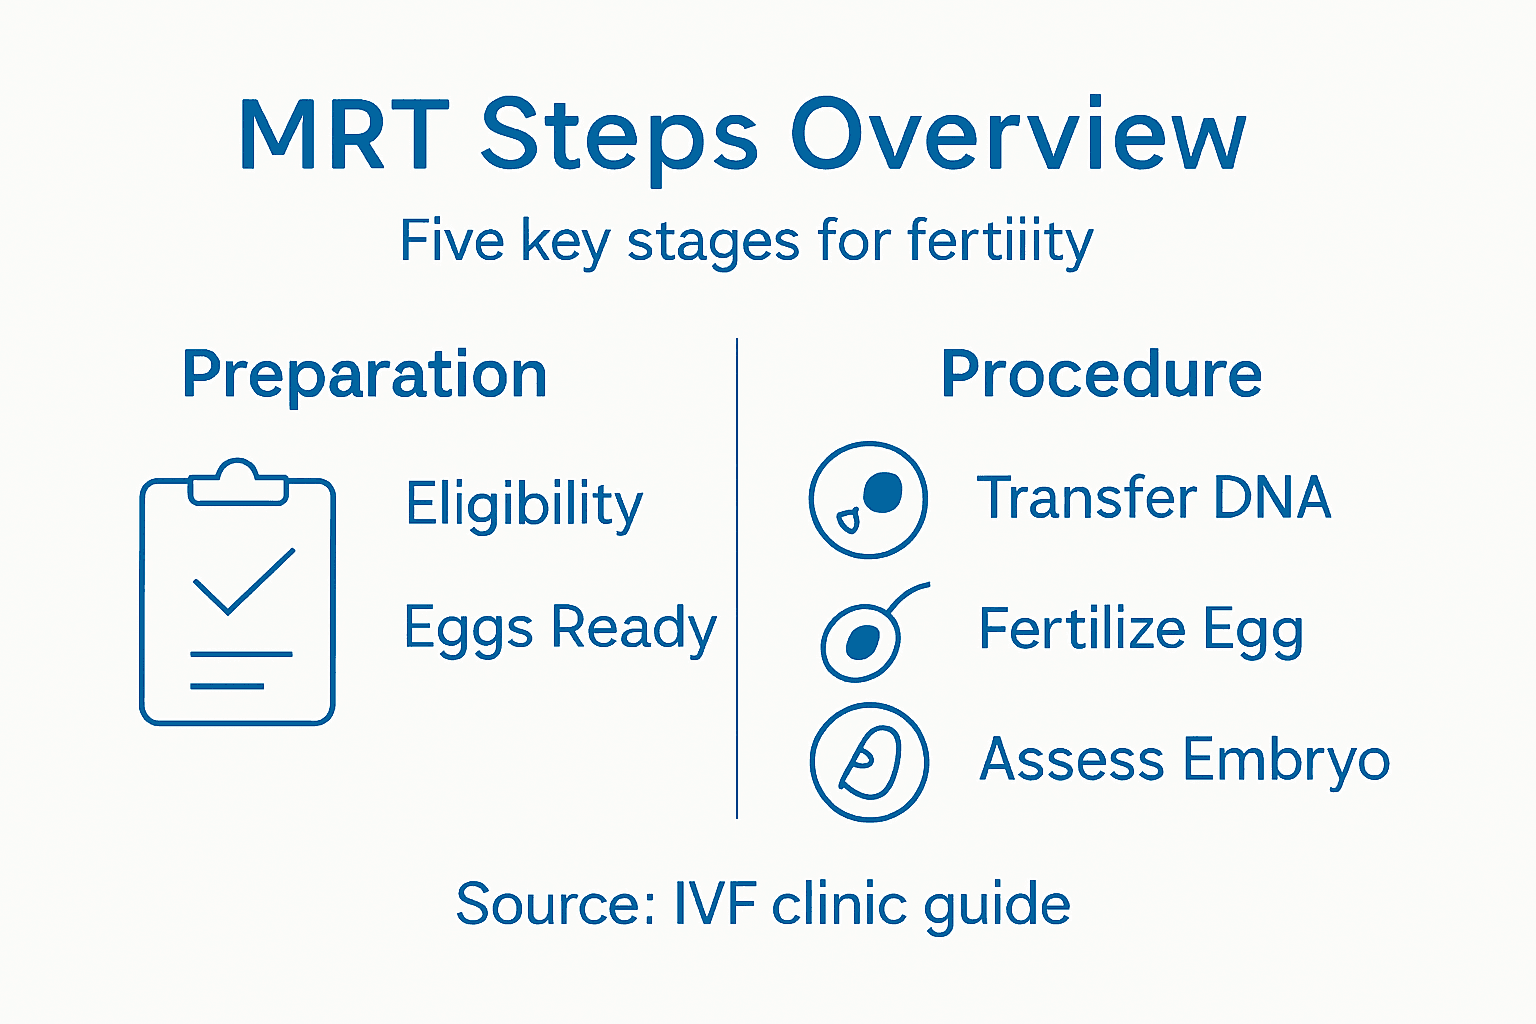
Mitochondrial Replacement Therapy Steps for Fertility Success
- 3 days ago
- 11 min read

Experiencing repeated IVF failures or poor egg quality can leave many hopeful mothers searching for a breakthrough. For women in the Bahamas facing diminished ovarian reserve and inherited mitochondrial DNA mutations, pursuing Mitochondrial Replacement Therapy offers a path to restoring genetic health and increasing the possibility of a successful pregnancy. This guide shares how eligibility is determined, eggs are prepared, and healthy embryos are created, helping you make informed choices about advanced fertility solutions tailored to your unique circumstances.
Table of Contents
Quick Summary
Key Point | Explanation |
1. Assess Mitochondrial DNA Mutation Load | Your eligibility for MRT relies on specific mitochondrial DNA mutation levels affecting egg quality, especially if you have previous reproductive issues. |
2. Ensure Rigorous Screening for Donor Eggs | Donor eggs undergo comprehensive health checks to ensure optimal mitochondrial quality, crucial for embryo development. |
3. Monitor Egg Preparation Closely | Close monitoring of both donor and recipient eggs during preparation maximizes the chances of a successful mitochondrial transfer. |
4. Choose Suitable Fertilization Method | Select between conventional IVF and ICSI based on sperm quality to enhance embryo development success rates. |
5. Evaluate Embryo Quality with Testing | Assess embryo quality and genetic integrity through morphological evaluation and genetic testing to determine suitable candidates for transfer. |
Step 1: Assess eligibility for mitochondrial replacement therapy
Assessing your eligibility for mitochondrial replacement therapy (MRT) is the critical first step in determining whether this advanced treatment can help you achieve a successful pregnancy. This evaluation goes beyond standard fertility testing—it examines your genetic history, current health status, and the specific mitochondrial challenges affecting your eggs.
Start by understanding what you’re being evaluated for. Your fertility specialist will investigate whether you carry mitochondrial DNA mutations that could impact egg quality and embryo development. This is especially important if you’re over 35 and have experienced poor egg quality, repeated miscarriages, or failed IVF cycles despite having normal chromosomes.
The eligibility assessment involves several key components:
Genetic testing and family history review to identify maternal inheritance patterns of mitochondrial mutations
Mitochondrial disease severity evaluation to understand how mutations affect your health and reproductive potential
Comprehensive health screening including blood work and imaging to ensure you’re healthy enough for the procedure
Risk assessment for offspring to determine the likelihood of passing mitochondrial issues to future children
Your clinic will conduct genetic testing for mitochondrial DNA mutations to identify specific abnormalities. This testing reveals whether you have heteroplasmy (a mix of normal and mutant mitochondria) or homoplasmy (mostly mutant mitochondria). The ratio of mutant to normal mitochondria in your eggs directly influences your candidacy—higher mutation loads typically make MRT more suitable.
During this assessment phase, expect detailed conversations about your reproductive goals and medical history. Your specialist will ask about previous pregnancies, miscarriage causes, egg retrieval outcomes, and any known genetic conditions in your family. Understanding how mitochondrial replacement works helps you recognize why this information matters for your specific situation.
Regulatory compliance is also evaluated during this step. Depending on your location, eligibility criteria include considerations of mitochondrial DNA mutations and regional regulations governing these procedures. Your clinic will ensure you meet all legal and ethical requirements for treatment.
You’ll receive genetic counseling as part of this assessment. A genetic counselor explains your test results, discusses inheritance patterns, and clarifies what MRT can and cannot accomplish for your situation. This is your opportunity to ask questions and fully understand the implications of treatment.
Your mitochondrial DNA mutation load and distribution across your eggs determine whether MRT offers meaningful benefit for your fertility goals.
Pro tip: Bring detailed medical records and any previous genetic testing results to your eligibility assessment—this accelerates the evaluation process and ensures your specialist has complete information for accurate candidacy determination.
Step 2: Prepare donor and recipient eggs for procedure
This step involves careful preparation of both donor eggs with healthy mitochondria and recipient eggs carrying your nuclear DNA. The process requires precision, timing, and specialized laboratory conditions to maximize success rates and protect egg viability throughout the preparation phase.
Your clinic will begin by obtaining fresh donor eggs from a screened healthy female donor. The donor undergoes rigorous health screening to ensure her eggs contain optimal mitochondrial quality and are free from genetic disorders or pathogens. This screening is critical because the donor’s mitochondria will support your embryo’s development.
Simultaneously, your eggs are collected during a standard hormone stimulation cycle. Both donor and recipient eggs require specific handling:
Donor eggs are isolated and prepared for nuclear DNA removal
Your eggs are collected and assessed for quality before nuclear extraction
Both batches are cultured in precise laboratory conditions to maintain viability
Timing coordination ensures both egg types are ready for the mitochondrial transfer procedure
Once collected, donor eggs need screening to be free of genetic disorders and your eggs undergo nuclear material extraction. This extraction process carefully removes the nucleus (containing your DNA) while preserving the cytoplasmic components that support early embryo development. Your clinic removes the nuclear DNA from the donor egg simultaneously, creating space for your genetic material.
Culturing conditions are maintained at exact temperatures and chemical compositions to keep both egg types viable. Your specialist monitors the eggs continuously to ensure they remain healthy and developmentally competent. The eggs cannot stay in culture indefinitely, so timing between preparation and the mitochondrial transfer procedure is carefully coordinated.
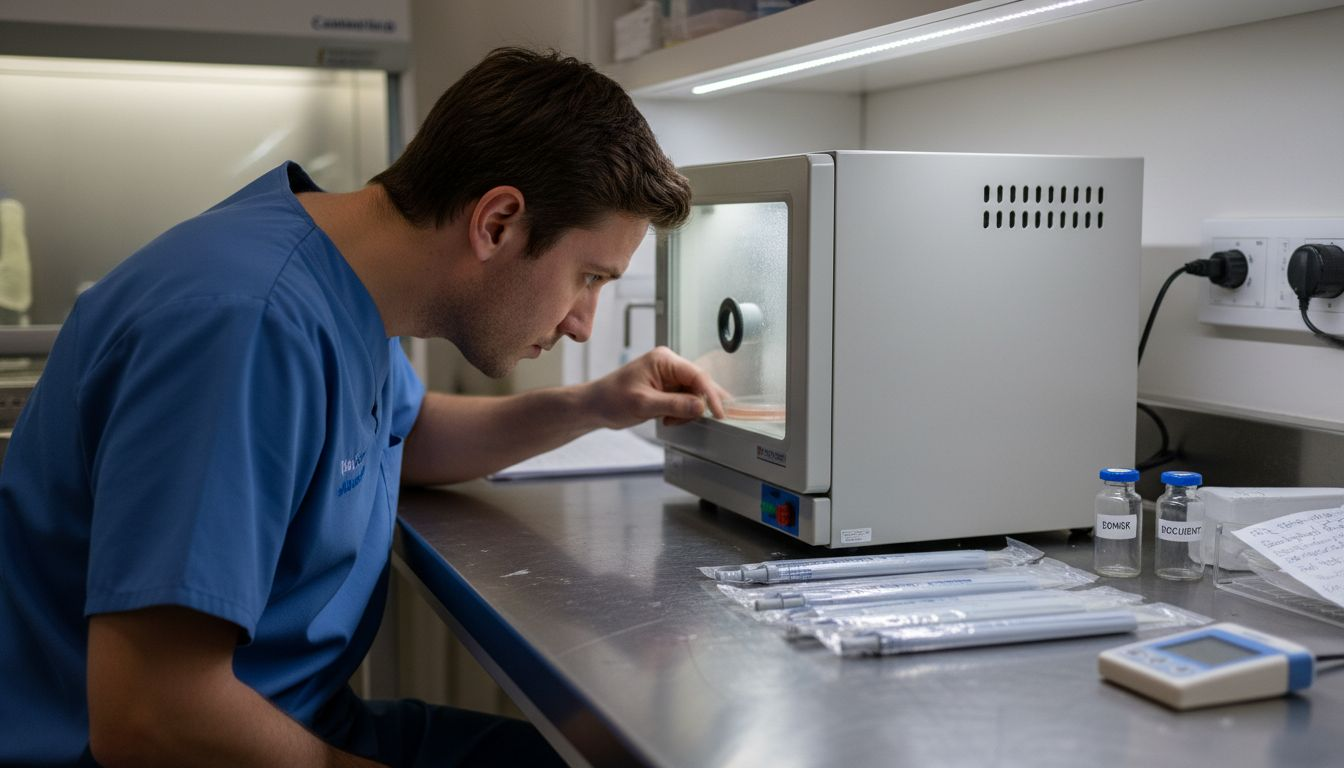
Quality control assessments occur throughout this phase. Laboratory staff evaluate egg maturity, morphology, and overall health. Preparation includes maintaining eggs in optimal culture conditions according to rigorous protocols that maximize success and minimize risks during the critical preparation window.
Expect your clinic to communicate regularly about egg status and readiness. You’ll receive updates on collection outcomes, fertilization plans if applicable, and the exact timing for your transfer procedure. This information guides your schedule and helps you prepare mentally and physically for the next steps.
Both donor and recipient eggs must meet strict quality control criteria before proceeding to mitochondrial transfer—this ensures the highest possible success rates.
Pro tip: Request a detailed written timeline showing collection dates, preparation schedules, and your planned transfer date so you can arrange work schedules and recovery time without uncertainty.
Step 3: Transfer healthy mitochondria to recipient egg
This is the core procedure of mitochondrial replacement therapy where your nuclear DNA is transferred into a donor egg containing healthy mitochondria. The transfer happens under a microscope using specialized micromanipulation equipment, and the precision required makes this one of the most technically demanding steps in the entire process.
Your clinic will select one of three proven transfer techniques based on your specific situation. Each method achieves the same goal—replacing defective mitochondria with healthy ones while preserving your genetic material. The technique chosen depends on egg maturity, laboratory expertise, and your medical history.
The three primary transfer methods are:
Here is a quick comparison of the three main mitochondrial transfer methods:
Transfer Method | When It’s Used | Key Advantage |
Spindle Transfer | Unfertilized eggs | Maintains full nuclear DNA |
Pronuclear Transfer | Fertilized zygotes | Compatible with IVF workflow |
Polar Body Transfer | Polar bodies from eggs | Minimizes nuclear handling |
Spindle transfer removes the spindle apparatus (containing your DNA) from your egg and inserts it into the prepared donor egg
Pronuclear transfer works with fertilized eggs by moving the pronuclei from your zygote into donor cytoplasm
Polar body transfer uses polar bodies from your eggs, reducing the amount of nuclear material that needs handling
During the procedure, an embryologist uses advanced micromanipulation tools to ensure precise transfer of your genetic material. Under high magnification, a micropipette carefully removes your nuclear DNA from the recipient egg while another pipette gently inserts it into the denucleated donor egg. This delicate operation typically takes 15 to 30 minutes per egg.
The newly reconstructed egg now contains your nuclear DNA and the donor’s healthy mitochondria. Each method involves the removal of nuclear material from your egg and its insertion into donor cytoplasm containing healthy mitochondria, effectively creating an egg with your genetic identity and optimized mitochondrial function.
After transfer, your reconstructed eggs rest in culture for several hours before assessment. The clinic evaluates whether the eggs activate normally and show signs of healthy development. Most eggs will then be fertilized with your partner’s sperm or donor sperm, depending on your fertility plan.
The success of mitochondrial transfer depends on both the technical precision of the procedure and the quality of eggs selected for the process.
Pro tip: Ask your clinic about their transfer success rates and embryologist experience with your chosen technique—this transparency helps you understand realistic outcomes for your specific situation.
Step 4: Fertilize the reconstructed egg with sperm
Now that your reconstructed egg contains your nuclear DNA and healthy donor mitochondria, it’s ready for fertilization. This step uses proven assisted reproductive technology to introduce sperm, creating an embryo that carries your genetics with optimized mitochondrial support.
Your clinic will prepare your partner’s sperm or donor sperm for the fertilization procedure. The sperm sample is processed and concentrated to identify the healthiest, most motile cells. Quality assessment ensures only viable sperm are used for fertilization.
Two primary fertilization methods are available:
Conventional IVF places prepared sperm and the reconstructed egg together in culture medium, allowing natural fertilization to occur
Intracytoplasmic sperm injection (ICSI) uses a micropipette to inject a single sperm directly into the egg cytoplasm
Your clinic selects the method based on sperm quality and your specific situation. If your partner has low sperm count, poor motility, or abnormal morphology, ICSI offers better fertilization rates. After mitochondrial replacement, the reconstructed egg is fertilized using conventional IVF techniques or ICSI depending on your sperm parameters.
Once fertilization occurs, the resulting embryo begins developing in the laboratory. Fertilization is performed using established assisted reproductive technology protocols to maximize fertilization efficiency and healthy embryo development. The embryologists monitor the eggs closely within 16 to 20 hours to confirm successful fertilization by observing the presence of two pronuclei (one from the egg, one from the sperm).
Successfully fertilized embryos continue culturing under precise temperature and chemical conditions. Over the next 5 to 7 days, your embryos develop from single cells into blastocysts—structures with distinct cell types ready for potential implantation. Your clinic tracks each embryo’s progression daily.
Not all embryos will develop normally, and this is expected. Your clinic will provide daily updates on fertilization results and embryo development. This communication helps you understand how many viable embryos you have for transfer or genetic testing.
Quality sperm selection before fertilization significantly impacts your overall success rates and embryo development potential.
Pro tip: If using partner sperm, request abstinence guidelines before the procedure—typically 2 to 5 days of abstinence produces optimal sperm quality for fertilization.
Step 5: Verify embryo quality and confirm success
This critical step determines which of your embryos are healthy enough for implantation. Your clinic uses advanced imaging and genetic testing to evaluate embryo quality, ensuring you have the best possible candidates for pregnancy.
Your embryos develop over five to seven days in the laboratory. During this time, embryologists observe them daily using specialized microscopes and time-lapse imaging technology. They track cell division patterns, fragment presence, and overall morphology to assess developmental competence.
Embryo quality assessment includes:
Morphological evaluation examining cell number, fragmentation, and symmetry at each developmental stage
Blastocyst grading assessing the inner cell mass and trophectoderm quality on day five or six
Time-lapse imaging documenting division timing and patterns that correlate with chromosomal health
Genetic testing using preimplantation genetic diagnosis (PGD) to screen for chromosomal and mitochondrial DNA health
Embryos derived from mitochondrial replacement therapy are evaluated for quality using morphological assessments and genetic testing to ensure healthy development. Your clinic may recommend PGD or preimplantation genetic testing for mitochondria (PGT-M) to verify that mitochondrial replacement successfully minimized mutant mitochondria levels in your embryos.
Genetic testing reveals critical information about your embryos. Confirmation of success includes verifying the embryo’s developmental competence and genetic integrity, ensuring that your reconstructed eggs now carry predominantly healthy mitochondria. The testing identifies any remaining mitochondrial heteroplasmy (mixed populations of mutant and normal mitochondria) and assesses nuclear chromosome health.
Your clinic will provide a detailed report on each embryo’s quality grade and genetic results. Embryos with normal chromosomes and low levels of mutant mitochondria are considered euploid and eligible for transfer. Your specialist explains which embryos rank as top candidates for implantation.
The following table summarizes essential embryo quality metrics after mitochondrial replacement:
Quality Metric | Purpose | Insight Provided |
Morphology Grade | Assesses structural appearance | Predicts implantation chance |
Genetic Test Outcome | Confirms chromosomal integrity | Screens for inherited disorders |
Heteroplasmy Percentage | Measures proportion of mutant mtDNA | Indicates risk for mito diseases |
Not every embryo will be viable, and this is normal. You may have several high-quality embryos, one perfect candidate, or unfortunately none suitable for transfer. Your clinic discusses realistic next steps based on your results.
Genetic testing confirmation provides certainty that mitochondrial replacement successfully protected your embryos from inherited mitochondrial disease.
Pro tip: Request a detailed embryo report including morphology grades, genetic results, and your specialist’s recommendations for which embryo offers the best implantation potential based on your specific situation.
Unlock Your Fertility Potential with Expert Mitochondrial Replacement Therapy
Struggling with poor egg quality or mitochondrial DNA mutations that impact your chances of a successful pregnancy can be overwhelming. This article clearly outlines the detailed steps of mitochondrial replacement therapy, emphasizing the importance of personalized genetic assessment, precise egg preparation, and advanced micromanipulation techniques to create embryos with healthy mitochondria and your own genetic material. If you are facing challenges like repeated miscarriages, failed IVF cycles, or age-related decline, understanding and accessing cutting-edge treatments is the key to reclaiming hope.
At the Rejuvenating Fertility Center in the Bahamas, we specialize in advanced mitochondrial replacement therapy led by Dr. Zaher Merhi, a pioneer in fertility innovation. We combine comprehensive eligibility assessment, stem cell therapies for ovarian rejuvenation, and expert embryo quality verification to maximize your chances of success. Start your journey today and explore how our scientific approach and personalized care can make a difference. Visit Rejuvenating Fertility Center to learn more and schedule your consultation. Discover detailed information about Mitochondrial Replacement Therapy and how our expertise addresses specific fertility challenges just like yours.
Frequently Asked Questions
What steps are involved in mitochondrial replacement therapy for fertility success?
Mitochondrial replacement therapy consists of five key steps: assessing eligibility, preparing donor and recipient eggs, transferring healthy mitochondria to the recipient egg, fertilizing the reconstructed egg with sperm, and verifying embryo quality. Follow these steps in sequence to maximize your chances of a successful pregnancy.
How can I determine my eligibility for mitochondrial replacement therapy?
You can determine your eligibility by undergoing genetic testing and a comprehensive health screening with your fertility specialist. Schedule an appointment to evaluate your mitochondrial DNA mutations and overall health to assess your candidacy for the procedure.
What preparations are necessary before the mitochondrial transfer procedure?
Before the mitochondrial transfer, both donor and recipient eggs must be selected and prepared carefully, ensuring both sets of eggs are viable and free from genetic disorders. Communicate with your clinic about the timeline for egg collection and preparation to ensure everything is ready on the day of the procedure.
How is the fertilization process conducted after mitochondrial transfer?
The fertilization process involves using either conventional IVF or Intracytoplasmic Sperm Injection (ICSI) to introduce sperm to the reconstructed egg. Discuss your sperm’s quality with your clinic to determine the best fertilization method for maximizing embryo development.
What factors are evaluated to confirm embryo quality after fertilization?
Embryo quality is assessed through morphological evaluations, blastocyst grading, and genetic testing. Request a detailed report on your embryos’ quality metrics to understand the viability and genetic health before proceeding with implantation.
How can I prepare for the eligibility assessment for mitochondrial replacement therapy?
To prepare for your eligibility assessment, gather detailed medical records and any previous genetic testing results. This information will help your specialist accurately determine your candidacy and streamline the evaluation process.
Recommended